Certificate backup Windows 10/11
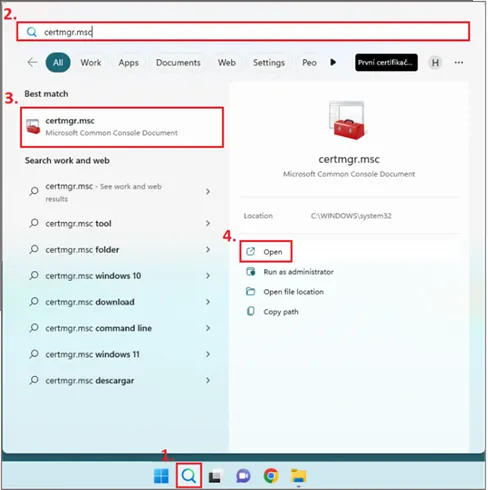
In the first step, click on the magnifying glass or Start and type the name of the application „certmgr.msc“ in the search box. Windows will offer you the application, which you click on and open it.
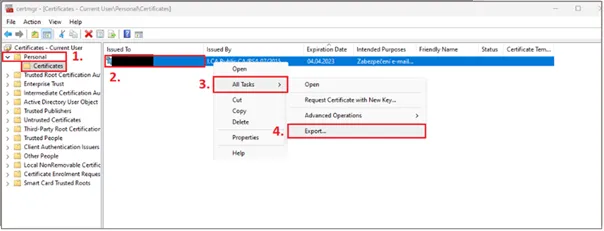
In the application, click on the „Personal“ folder and here also „Certificates“. Select the certificate you want to export and right-click on the certificate. In the menu, click on „All tasks“ and select „Export“.
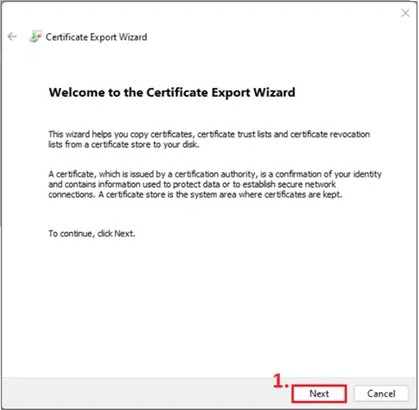
This will open the export wizard, in which click on the „Next“ button.
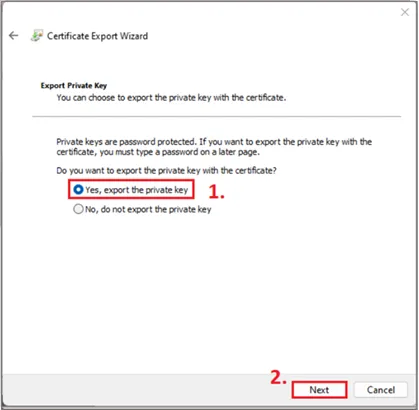
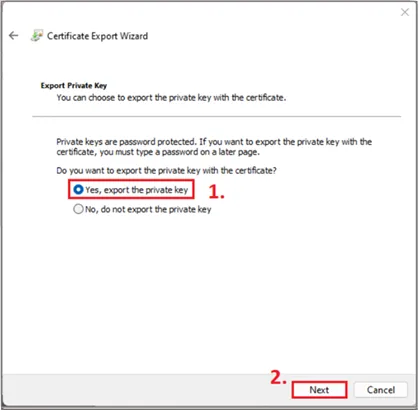
In the next step you need to select „Yes, export private key“ and continue to the next step.
You will keep the file format as the default and continue to next step.
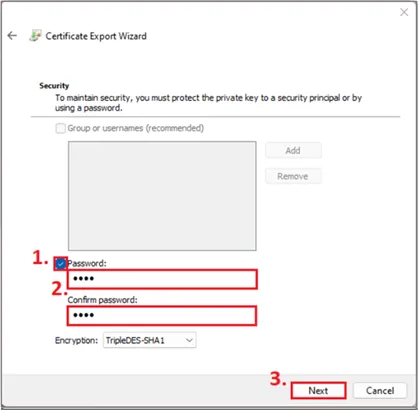
Here you check the password (it won't let you proceed without a password) and choose the password you will then need when importing with the certificate backup.
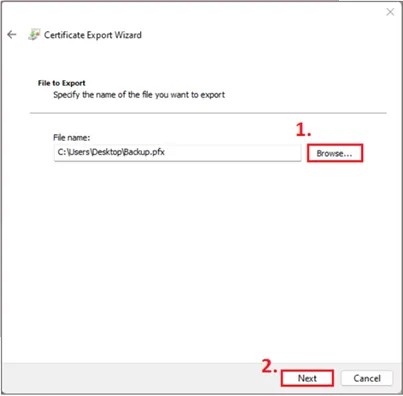
After creating the password, you need to choose a file name and where it will be saved. Click the „Browse“ button, select your desktop for example, and continue to next step.
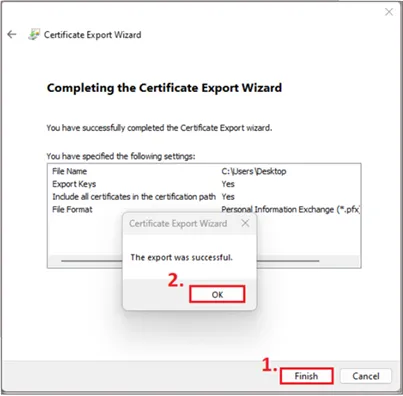
In the last step, click on the finish button and confirm the window with information about the successful export.