Using certificates in Mozilla Thunderbird
Using certificates in Mozilla Thunderbird
Import certificate in PFX format
To import a certificate, you will first need to have a backup of the certificate in PFX format. You can make a backup by following the instructions here: I.CA | Certificate Backup (ica.cz).
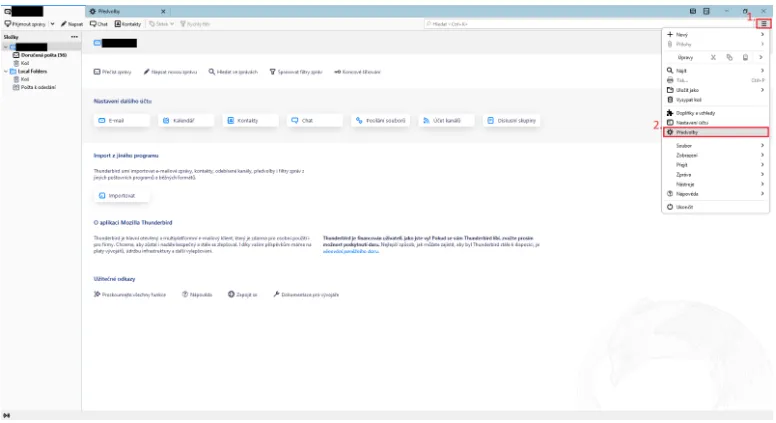
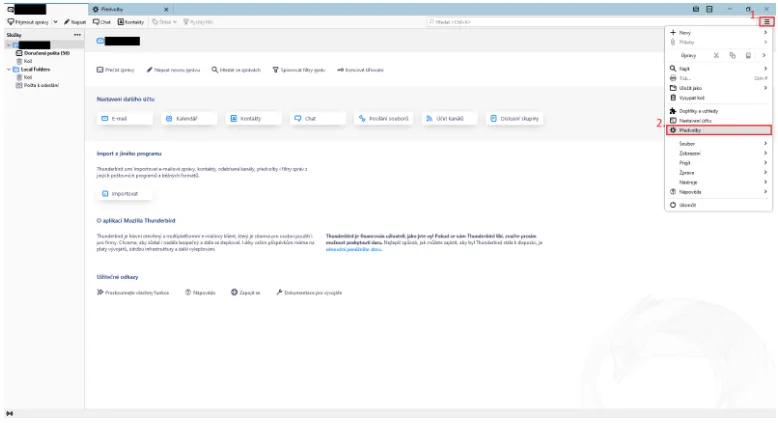
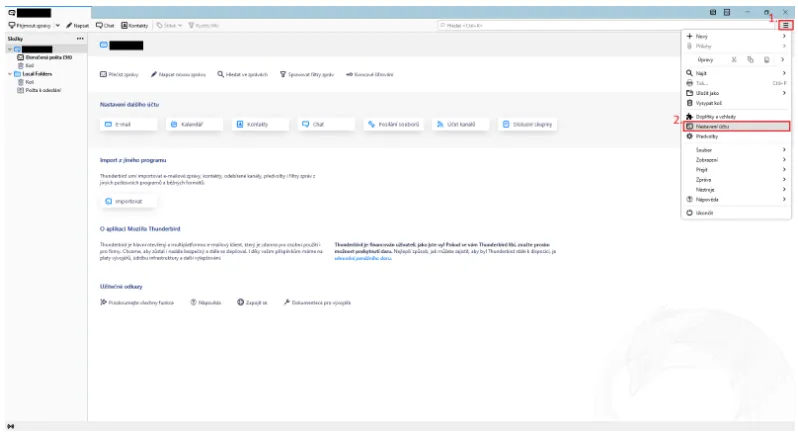
Open Mozilla Thunderbird. Click on the menu icon in the top right corner. Select "Preferences" from the drop-down menu.
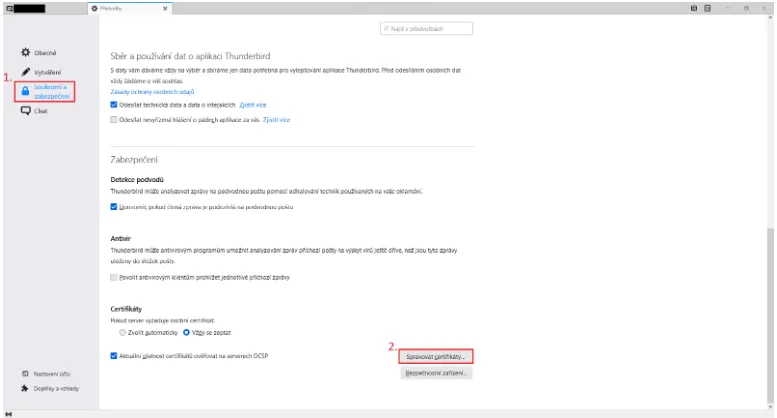
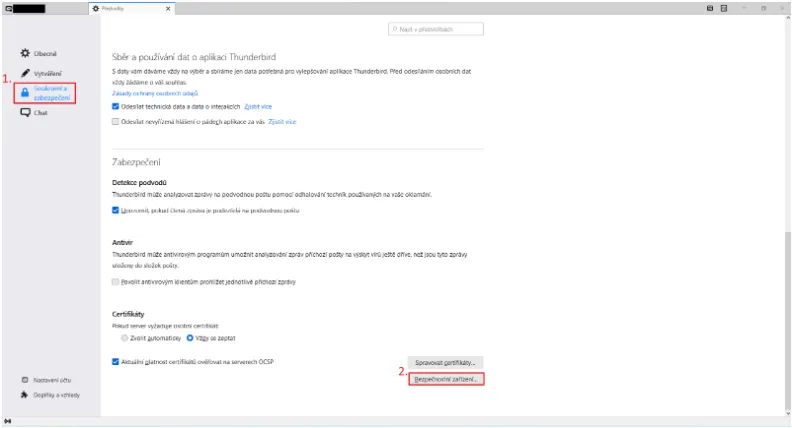
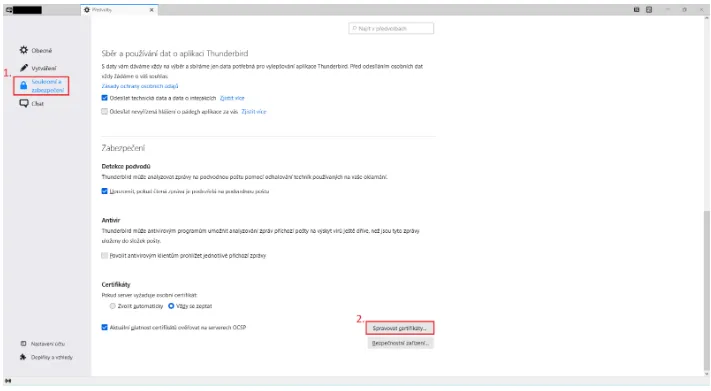
From here, go to "Privacy & Security", scroll down and click on "Manage Certificates".
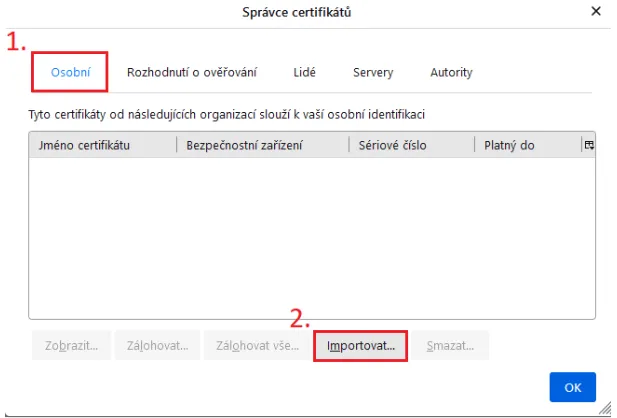
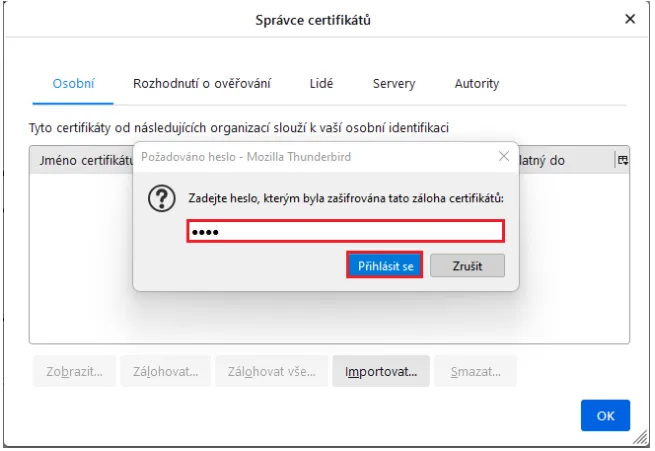
A window will open where you click on the "Personal" tab at the top and select "Import"
In the following window, you will set the path to backup the certificate in PFX format and confirm your selection.
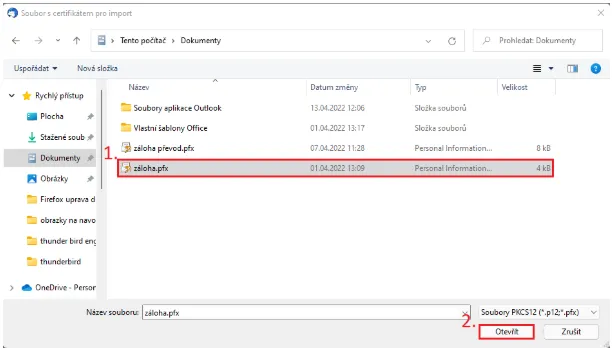
After selecting the file, you need to fill in the certificate backup password that was set when creating the backup.
Introduction of support for certificates stored on the Starcos smart card with the I.CA SecureStore application
Open Mozilla Thunderbird. Click the menu icon in the upper right corner. Select "Preferences" from the drop-down menu.

From here, go to "Privacy and Security" and scroll down and click on "Security Devices".
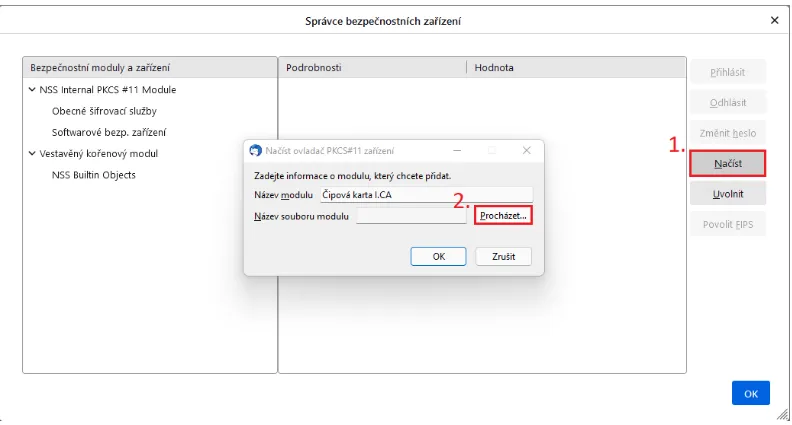
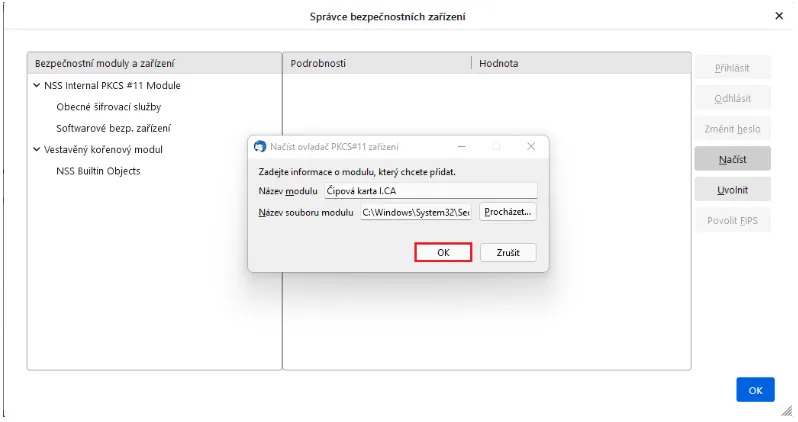
This will open a new window where you click on "Load" on the right. In the new window you can choose the name of the module and then choose "Browse".
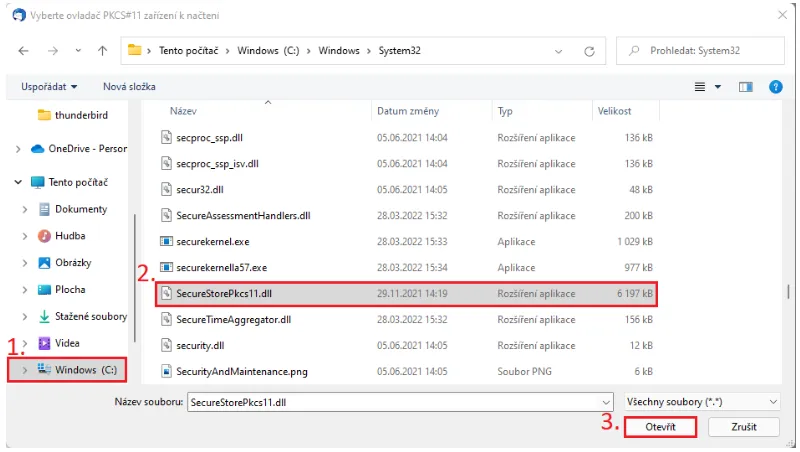
You will need to set the path to the PKCS11 library in your computer's storage. The path to the library is as follows: C:\Windows\System32\SecureStorePkcs11.dll
After setting the path to the library, confirm the following window.
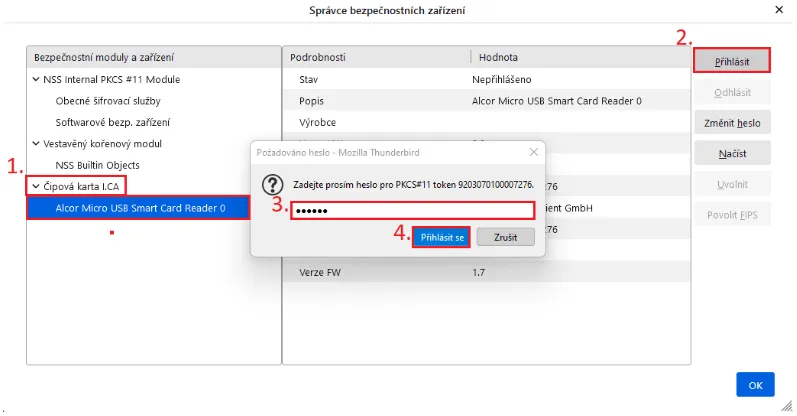
On the left side of the window you will see the module you have set up, where you will see the name of the reader you clicked on, and on the top right you will click "Login". In the password window, enter the PIN for the card and confirm the login.
To set trust for root certificates
Click the menu icon in the upper right corner and select "Preferences" from the drop-down menu.
From here, go to "Privacy and Security" and scroll down and click on "Manage Certificates".
In the next window, go to the "Authorities" tab and find the root certificates from the First Certificate Authority in the list. The list should be sorted alphabetically. Highlight the certificate in the image below and select "Edit Trust". In the new window, check all the trust setting options and confirm.
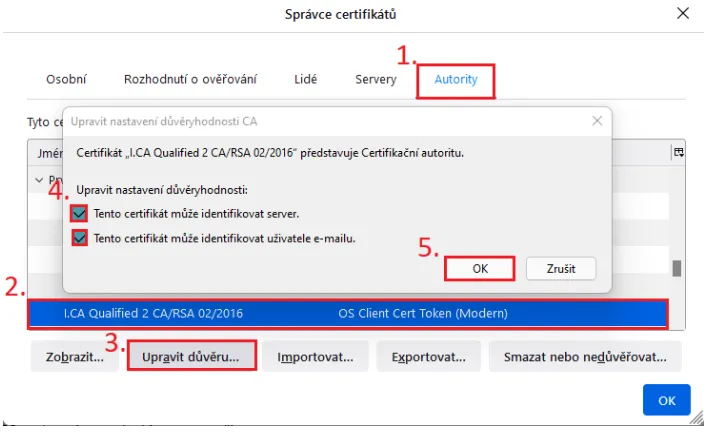
Repeat the process for the other root certificates.
To assign a certificate to a user account
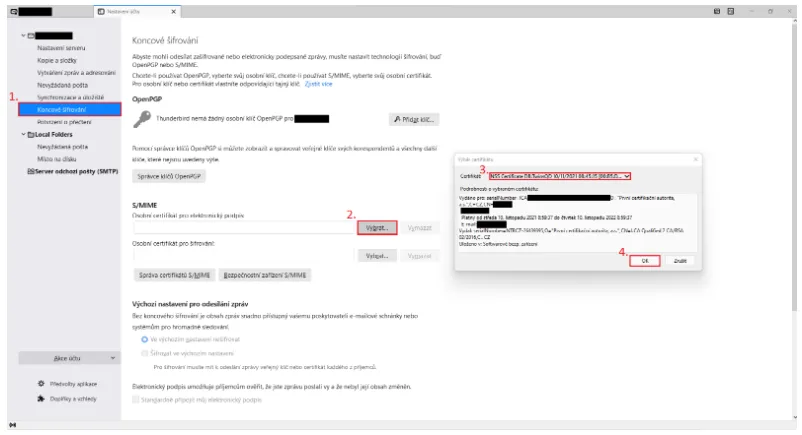
With the application open, click the menu icon in the top right corner and select "Account Settings" from the drop-down menu.
In the account settings on the left, select "End-to-end encryption". In the "Personal certificate for electronic signature" box, click "Add". A new window will open for you to select a certificate. In the top row you can switch certificates and in the details you can check if you are selecting the correct certificate. Once you have selected a certificate, confirm your selection. Always select a qualified certificate for signing.
After confirming the certificate selection, you will be presented with a menu to set the encryption certificate. If you will not encrypt, you can decline the offer. Alternatively, the certificate for encryption can always be set. A commercial certificate is set for encryption.

You can now sign e-mail messages. To sign a message, click on "Security" in the message and select "Sign message electronically". The message will be signed when it is sent.
Fig.